Mississippi College
Computer Science 114
This lesson looks at the basics of processing digital images using Python. Digital images are arrays of dots, called pixels, the small points of color which make up an image. We will manipulate the pixels one at a time to change the appearance of the image. Note that Python is rather slow for this kind of application. Serious image processing applications are usually written in a language such as C, which is designed more for execution speed than programmer convenience. However, such programs do exactly the same sorts of computation as we will perform.
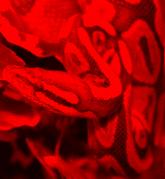
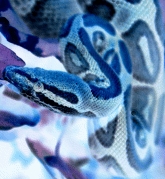
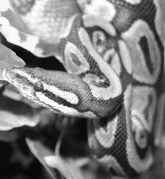
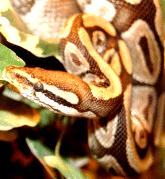
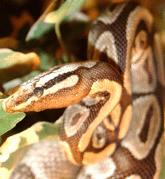
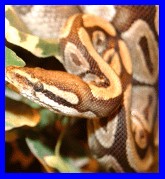
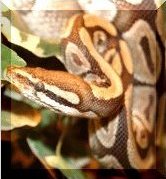
Download the following test images. Store them wherever you like, and can remember for later.
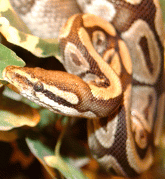
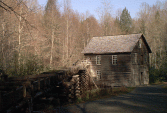
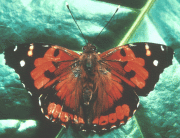

To download, right click and select save target or save image. The test images are small since Python tends to be slow at this, as noted above. They are GIFs, since that's what our example tool reads. You may save them anywhere you like, but remember the location since you'll have to find them again.

Now, download this Python image manipulation program and save it on your desktop. Again, right click and tell the browser to save the target.
You should be able to run the program straight from the desktop by double-clicking. You will see a window appear with a standard File menu at the top, a menu labeled "Modifiers", and an empty area. Use the File menu to open the image
Python_royal_35.gifwhich you downloaded earlier. It will appear in the window. For now, the program can display GIF images, but not modify them.To enable the program to modify images, you must create plug-ins to perform the manipulation. These are small bits of Python code located in a particular folder, by default the folder
modifierson the desktop.Now we need to create that folder. Right click on the desktop, select New, then Folder. Name the new folder
modifiers.Open Idle and create the following small Python program:
# Here is the implementation for the lighten function.Save it in a file
label = "Brighten"
ordinal = 1
def modify(pic):
for row in range(0, pic.height()):
for col in range(0, pic.width()):
p = pic.idat[row][col]
p.r = min(p.r + 30, 255)
p.g = min(p.g + 30, 255)
p.b = min(p.b + 30, 255)brighten.pywithin themodifiersdirectory on the desktop.*Return to the image program, click on Modifiers, and select Reload. This informs the program that you have changed the modifiers, so it will recheck them. A button labeled Brighten will appear. Press it, and see that the picture brightens.
Each file in the plug-ins directory specifies a method to modify the image. As shown, you provide three things:
label,ordinalandmodify.† For each plug-in, the image manipulation program displays a button. The label is a string shown on a button in the image tool. When you press that button, it calls themodifyfunction. The buttons are displayed in order of theirordinalvalues, which are integers. You must always use these same standard names in each plugin.The
modifyfunction takes a single parameter which is the image it modifies. It is a two-dimensional array of pixels. Its size in pixels is described bypic.height()andpic.width(). Any particular pixel can be accessed bypic.idat[r][c], where r and c are the row and column number. Each can be any integer expression, ranging from 0 topic.height()-1 andpic.width()-1, respectively. We used subscripting in Lesson 2 and Lesson 3 to select individual characters from a string. We are applying the same operation here to select pixels out of an image. Very often, we access the pixels with a double loop of the sort you see in the brighten plug-in. The outerforgoes through each legal row number. For each row, we go through each legal column number. Inside the two loops, the program generates each possible pair of row and column numbers, and therefore refers to each pixel. The body of the doubleforloop, then, is executed exactly once for each pixel in the image.Each pixel has three parts,
r,gandb, for red, green and blue. Each is an integer value from 0 to 255 indicating how brightly that particular color is turned on. You can access and change these values, as shown here. Consider the brighten loop body. First,p = pic.idat[row][col]gets the pixel for this iteration and places itp. Then,p.r = min(p.r + 30, 255)increases the red level by 30, but not more than 255. Thep.ris just an integer variable that is part of the pixelp. We could almost use insteadp.r = p.r + 30The only reason we don't is to avoid producing a result exceeding 255. The builtinminfunction returns the lower of its two arguments. If the sump.r + 30is less than 255,minreturns that. If it is more,minreturns 255. We then do the same thing for green and blue.A. Ruin Your Image
Change each pixel assignment in the brighten plug-in to eliminate themax. That is, change the first one fromp.r = min(p.r + 30, 255)top.r = p.r + 30and make the similar change to the other two components. Run the program and press the Brighten button several times to see what happens. The results are interesting. Then restore the assignments so the program operates correctly.B. Improve Your Image
Implement some of these additional transforms, as your instructor directs. Each will be defined by creating a.pyfile in themodifiersdirectory. Whenever you create a new transform, or modify an existing one, be sure to use Modifiers -> Reload. This tells the program to recheck the directory. Also note that, when you load the plug-ins, Python will create a.pycfile of the same name. Just leave them alone.‡- Implement a Red button. This button eliminates all color from the image except red. It is fairly simple: Go through each pixel as the Brighten button does, and set the green and blue components to zero (turn them off).
- Implement a Negative button to create a negative image. Subtract each component of each pixel from 255. This inverts each color intensity — light colors become dark, and vice versa.
- Implement a button
to convert the image to black and white.
In such a picture, each pixel is black, white, or some shade of gray in
between. This means that the three components of each pixel are the same.
The standard formula for the gray level of an RGB pixel is:
gray = int(round(0.299 * red + 0.587 * green + 0.114 * blue))To compute your black-and-white picture, go through each pixel, compute the gray value by the above formula, then assign that (same) value to each component of the pixel. This formula comes from video standards, and approximates the way the eye perceives the various colors.
The
roundbuiltin function rounds to an integer value, and theintfunction changes its type to integer. - Implement a contrast improvement button.
This button attempts increase the contrast in the image by spreading out
the range
of pixel values. For each component of each pixel, apply the following
rules.
- If the value is less than 30, change it to zero.
- If the value is more than 225, change it to 255.
- Values c in the range 30 to 225 should be scaled to the range 0 to 255
by this Python formula:
int(round((255.0 / 195.0) * (c - 30) + 0.5))
As you can see (perhaps with the help of a calculator), a component of 30 becomes 0, and 225 becomes 255. Smaller values are reduced: 45 becomes 20; larger ones are increased: 180 becomes 196. Middling values are changed little: 120 becomes 118. In short, the values between 30 and 225 are smoothly spread to cover 0 to 255. This increases the separation of the values, and therefore increases the image contrast.
You might want to create an extra function to perform this mapping, then your loop body can call it in three places, one for each color component.
- Implement a Flip button.
The flip button turns the picture upside-down. It does this by
exchanging pixel values. Each pixel in row zero must be exchanged
with the one below it in row
pic.height()-1. Pixels in row 1 must exchange with pixelspic.height()-2, and so forth. You can write aforloop likefor row in range(0, pic.height()/2)which will go through the top half of the rows. The pixels in eachrowmust then be exchanged with those inpic.height() - row - 1. In Python, you can exchange two values with an assignment likea, b = b, a - Place a pure blue border, five pixels wide, around the picture.
The short version of how to do this is
to find all the pixels which are part of the
border and turn them blue. Changing a pixel to blue is easy: Just set the
blue component to 255 and the others to zero.
So, how to get just the right pixels? While there are more efficient approaches, one way is to go through all the pixels as the Brighten example does, and use an
ifto select only pixels located on the border. You can identify them by their row and column. Pixels which are located on the left border have column numbers less than the width (five in this case). Likewise, pixels on the top border have row numbers below five. Pixels on the bottom border are close enough to the picture's bottom to be within the border. You can detect these with an expression likerow >= pic.height() - 5(or various equivalents). The right border can be detected in similar way with the column number and image width. So, you can use the usual loop to visit all the pixels, then use anif(or severalif's) to detect when the current pixel is on one of the borders. If it is, turn it blue. Otherwise, leave it alone.If you are interested in a more efficient (and more difficult) solution, you can use separate loops that only visit the border pixels. You can use a sequence of four double loops, each much like the one in the Brighten example. Instead of covering the whole image, each loop must must cover one of the border areas.
The easiest solution colors the corner areas twice. If you're really careful, you can avoid this, but there's not much benefit.
If you want an even more interesting variation, use two pair of nested loops (not four), where one colors the left and right border, and the other takes both the the top and bottom. For the left/right border loop, each iteration sets a pixel on the left border, and also the pixel of the right border in the mirror position. The top/bottom loop is organized in a similar way.
- Implement a Pixelize button.
This is probably the most difficult in this list.
The problem is to divide the image up into squares of ten
pixels on each side. At the lower and right edges, some of these
"squares" are not really squares at all; they are smaller because
otherwise they would extend past the edge of the image.
Within a square, each component of each pixel must be set to
the average value for the square. You will want to set an
outer loop which goes through the pixels, and two inner loops,
one to compute averages and one to assign new pixel values.
Here's a skeleton of the loop you need:
# Go through the upper corner of each square.
for rrow in range(0, pic.height(), 10):
for rcol in range(0, pic.width(), 10):
# Do some initialization here.
# Go through the pixels in the square.
for row in range(rrow, min(rrow + 10, pic.height())):
for col in range(rcol, min(rcol + 10, pic.width())):
# Add up each component, and count the number
# of pixels
# Find the average value for this component.
# Go through the square once again.
for row in range(rrow, min(rrow + 10, pic.height())):
for col in range(rcol, min(rcol + 10, pic.width())):
# Assign the average to the pixel. -
Create a modifier to
add a beveled edge to a picture. The bevel is 10 pixels wide on each side.
Notice that there are four trapezoidal
border regions, top, bottom, left and right.
Each of these border regions is lightened or darkened different amounts
to produce the needed effect.
Pixels in the top region are brightened by 65; in the bottom, they are
darkened by the same amount. On the right, they are brightened by 40,
and darkened by 40 on the left.
This shading simulates the effects of a light source above and
to the right of a beveled object with a raised center. Since the human
brain is accustomed to overhead lighting, the modified picture should appear
to have it center area raised, with the edges sloping back from the
viewer. If you invert the shading values, the image will appear to be
be raised at the sides and depressed in the center.
Locate the border pixels using methods similar to those used to draw the blue border above. Once you know a pixel is on the border, you must figure out which side of each of each corner diagonal it falls on. The easiest way to do this is to see which side the pixel is closest to. For instance, the pixel at row 6 column 2 is in the left border region because it is closer to the left edge (2 away), than from the top (6 away). If an image is 200 pixels wide by 250 high, the pixel at row 246, column 191 is in the bottom area because it is closer to the bottom (249 − 246 = 3) than to the right (199 − 191 = 8).
If you use multiple loops to process each border region separately, you must take more care to be sure each one covers exactly the (trapazoidal) border region. Pay attention to which dimension is covered by the outer loop, and which by the inner. The outer loop must move from the edge inward, and the inner loop must cover one pixel less on each end, each iteration. For instance, the left border area might be scanned with a loop like this:
for col in range(0, 10):This goes through the columns in the left region, which is ten wide, stepping inward from the left edge. The inner loop modifies each pixel in the column selected by the outer loop, but not every pixel in the column. At each step, one pixel is eliminated from each end of the column scan. The double loop then covers the appropriate trapazoid.
for row in range(col, pic.height() - col):
...

Try your operations on each of the test images to see what happens. Photoshop is a tad more complex, but makes the same kinds of calculations you are making.
Try applying some of your operations multiple times. Except for Flip and Negative, once you have applied the operation, you cannot get your original image back, except by reloading it from the file. Could you create buttons to undo the other transforms without keeping a copy of the original image around? Could you create a Darker button that would always exactly reverse the Brighter button?
Computers are high-speed detail artists. An image is manipulated by doing many fairly simple calculations over and over for each pixel in the image. The human mind sees a whole image, but the computer only "looks" at one pixel at a time. This is also the primary difficulty of programming. The computer executes many small instructions quickly, but it has no sense of what the program does. It is the programmer who must make the connection between the program and its parts. And that can be a challenge.
In this lab, you used a Python GUI program. In Lesson 5, we'll try writing some.
*Actually,
the file name doesn't matter,
so long as the extension is .py and it's in the right folder.
†Actually, label and ordinal are optional.
The system creates default values for them.
‡The .pyc file is a binary representation
of your code. The system creates them for you since they load faster.
Copyright 2005, 2006
Thomas W Bennet •
Image Credits
•
Terms of use:
Creative
Commons