The Python Image Tool is a small, simple program for
manipulating images.
It is written in a programming language called Python.
To manipulate images, the user creates
modifiers.
Modifiers are small Python programs which the image tool
calls in response to a button press. These perform
arithmetic on the pixel values to modify the image.
Software to run the Python language is installed on lab computers.
If you would like a copy for your computer, Python is free,
installs easily, and can be gotten from
python.org.
The image tool itself is here.
This page is an introduction to the image tool.
We provide installation instructions, and a short
test drive.
| | |
- If you are in the on-campus 114 lab lab, go on step 2.
If you're doing this at home or elsewhere off-campus,
you will probably need to install the Python language.
Python is available for
Windows, Mac and Linux, from a
download page here at
python.org.
Use the the latest version. I have found the Windows installer
to work smoothy; I'm afraid I have no experience with Mac.
Python is much-used on Mac, but a bit of Googling suggests you might
be happiest with this version from Python.org.
(If anyone else out there is a Linux fan, install from your distro.
Make sure to get Python 3, and also install the tkinter package
for Python 3.)
|
- Download the image tool
and save it on the desktop, or
some other appropriate place. The file should have an icon
something like this:
 . .
|
- Download the picture of a snake to
the right. Just clicking on it should work. Otherwise, right click and
choose something close to "save target as." Save the image on the
desktop.
|  |
- Double-click on the program you downloaded. The tool
should start and show a small greenish square. Be patient though;
this program is not particularly fast.
|  |
- Use File/Open to open the image in the image manipulation tool.
Again, it may take a moment for the image to appear.
|  |
- Click somewhere on the image. A small window will pop describing the
pixel you clicked on. It will give numbers for each color, 0 to 255, and
numbers for row and column. Pixels are arranged in rows and columns, with
the upper left corner being row 0, column 0. When you click in different
places, the pop-up changes to describe the pixel where you clicked. Try a
few until you see how the row and column numbers relate to where you click,
and the color values describe the color at that spot.
|
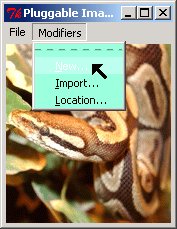
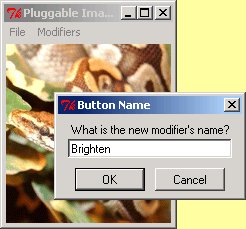
- Use the Modifiers
menu to create a new modifier. Name it “Brighten”.
| 
 |
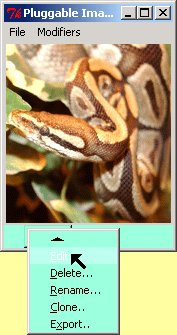
- A button will appear for your modifier.
Press it, and see that it doesn't do anything.
To make it do something, you need to edit
the modifier. Right click on the modifier button to get
a menu. Choose Edit from the menu.
| 
 |
- You will now see a window called “Brighten”. It's a text
editor, much like Notepad. This contains instructions which are
executed when you press the Brighten button. Most of
the lines start with #. These are called comments. They
provide information for a human being who reads the file, but
are ignored by the computer. The part of this file that matters
is near the top, and it looks like this:
# Modify this function to perform some operation on each pixel. The
# initial version just sets each component to its original value.
def each_pixel(pix, row, col):
pix.r = pix.r
pix.g = pix.g
pix.b = pix.b
This defines a function called each_pixel.
- As you might suppose, each_pixel gives instructions on how
to modify each pixel of the image.
- The names pix, row and col are called parameters.
When the image tool executes each_pixel, it first sets
the parameters to describe the pixel being modified.
- The pix parameter describes the pixel, so it has three parts
for the three colors: r, g and b.
- The row and col parameters are the position of the pixel
in the image.
- The three indented lines form the body of the function.
They are the instructions the computer must follow when the
function is run.
- Each of the instructions here is an assignment. It sets the
value of a variable. These particular examples are fairly useless,
however, since they just set each color to itself, making no change.
|
- Now, let's make our button match its name. Simply change the
function to look like this:
# Modify this function to perform some operation on each pixel. The
# initial version just sets each component to its original value.
def each_pixel(pix, row, col):
pix.r = pix.r + 30
pix.g = pix.g + 30
pix.b = pix.b + 30
This simply adds 30 to each color. Since the tool calls
each_pixel for every pixel, this will brighten the picture.
|
- From the editing window, save the changes and exit the
editor window.
|
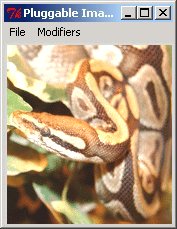
- Now press the brighten button. You should see the image become
brighter. Press it a few more times.
|  |
- More stuff as time permits. Note that changes can depend on either
the original color, the position or both. Some things to try:
- Turn the entire picture green.
- Create a negative or black and white image.
- Darken only the lower half of the image.
- Create a bright spot in the center of the image by brightening
pixels differently based on how close they are to the center.
|